Photoshop照片处理教程 简单高效回复照片的亮丽色彩
作者:网友整理
Photoshop手机版下载中文版安卓(Photoshop Express)9.8.77 245.60M / 简体中文
点击下载
摄影教程PS大师安卓版v1.7 正式版 44.58M / 简体中文
点击下载
Adobe Photoshop CS4安卓版(Ps CS4) 免费中文版 27.75M / 简体中文
点击下载大家在拍摄外景照片时,常常都会因为天气问题,照片的色彩比较灰暗。今天小编就为大家介绍一只简单的校正灰暗照片的方法,经校正后的照片变得更鲜艳亮丽,如图所示。
效果图:
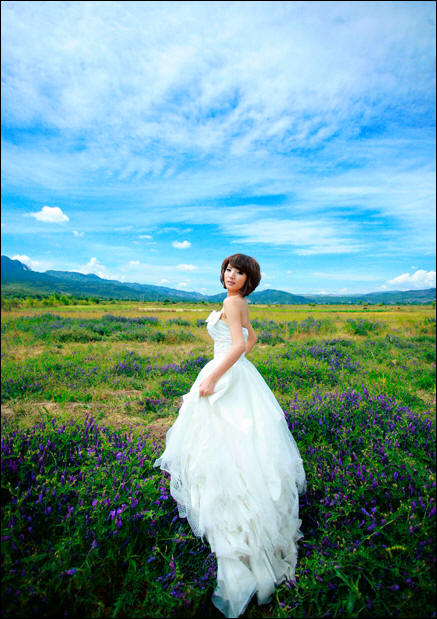
原图:

[page]
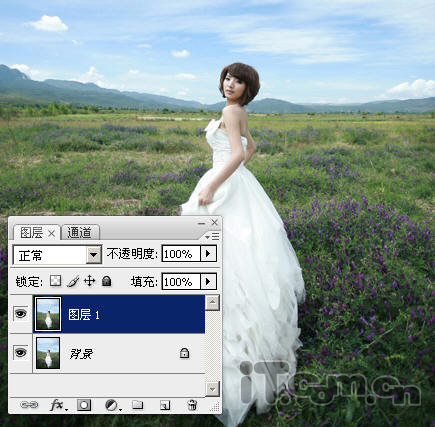
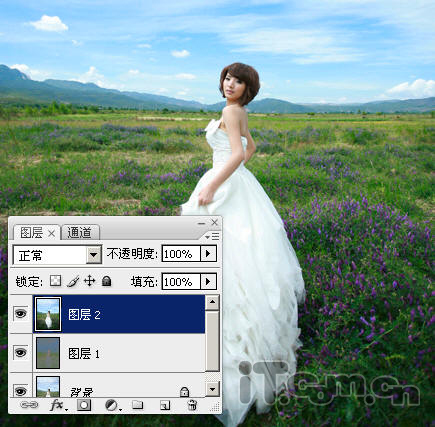
1、首先打开需要校正的照片,选择“图像—模式—Lab颜色”,然后按下Ctrl+J复制出图层1,如图所示。
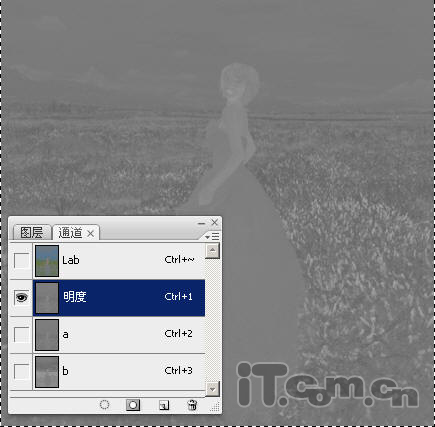
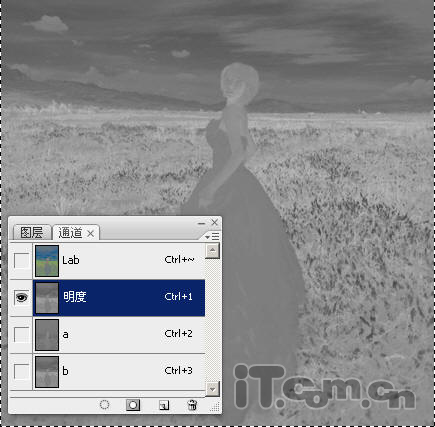
2、打开通道面板,选择“a”通道按下Ctrl+A和Ctrl+C执行拷贝命令,然后单击“明度”通道 ,按下Ctrl+V粘贴,如图所示。
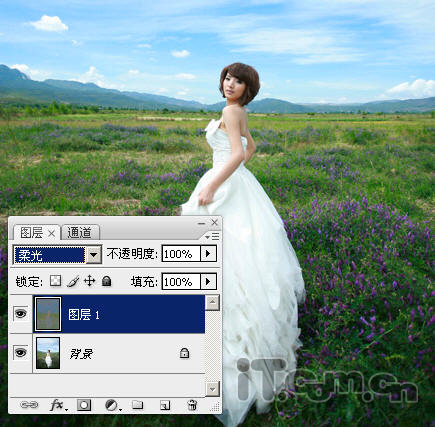
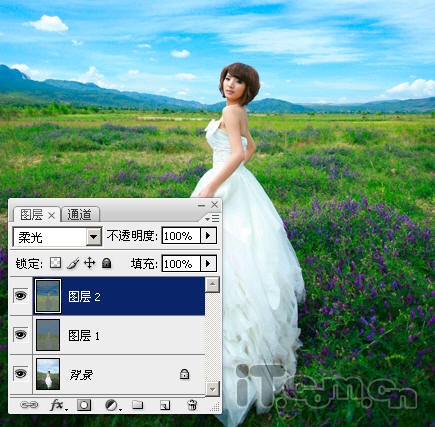
3、单击“Lab”通道,然后返回图层面板,设置“图层1”的混合模式为“柔光”,如图所示。
[page]
4、按下Ctrl+Shift+Alt+E盖印图层,得到图层2,如图所示。
5、打开通道面板,参考步骤3的方法,复制“b”通道到“明度”通道中,如图所示。
6、单击“Lab”通道,然后返回图层面板设置图层2的混合模式为“柔光”,如图所示。
[page]
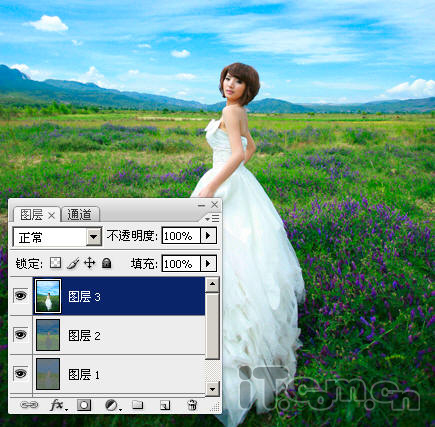
6、按下Ctrl+Shift+Alt+E盖印图层,得到图层3,如图所示。
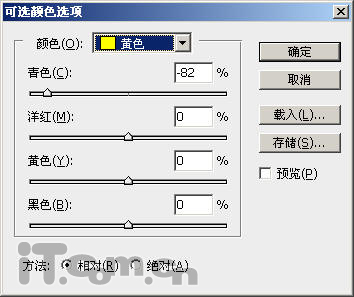
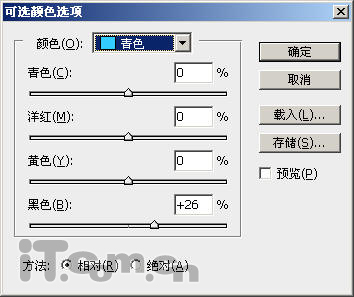
7、单击图层面板中的“创建新的填充或调整图层”按钮,选择“可选颜色”,然后分别设置“黄色”、“青色”、“黑色”,如图所示。用户可以根据照片中实际的色彩设置不同的颜色。
[page]
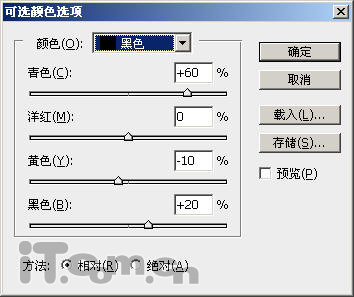
8、再选择“创建新的填充或调整图层”按钮,选择“可选颜色”,设置黄色的参数,如图所示。

最终效果:
加载全部内容